Why Getting Outdoor-Ready and Resilient Matters More Than Ever
The city is convenient. It’s also fragile. Public transport, food delivery, lights on demand – they all rely on systems you don’t control. The outdoors works differently. On the trail, in the forest, or in the mountains, your body, your mindset, and your skills suddenly matter. A lot.
Becoming “outdoor-ready” isn’t about turning into a hardcore survivalist overnight. It’s about building a base level of strength, endurance, and resilience so you can handle real terrain, changing weather, and minor setbacks without panicking or breaking down. You want to go from feeling like a visitor in nature to feeling like you have a right to be there.
This 4-week beginner’s plan is designed for people who spend most of their time in the city but want to step confidently onto wild trails. You’ll move more. Lift your own body. Carry weight. Learn basic survival-oriented habits. And by the end of four weeks, you’ll be able to tackle a solid day hike – or a light overnight trip – with greater confidence and less risk.
Principles Behind This 4-Week Outdoor & Resilience Plan
Before jumping into the week-by-week work, it’s worth understanding what we’re actually training. This isn’t just “get fit.” It’s “get usefully capable outdoors.” That’s different.
Every session in this plan is built around four pillars:
- Functional strength: The ability to push, pull, squat, hinge, and carry your own body and a loaded backpack.
- Aerobic endurance: Slow, sustainable effort so you can hike for hours without burning out.
- Resilience & discomfort tolerance: Gradual exposure to cold, heat, elevation gain, and uneven ground.
- Practical preparedness: Small survival-minded habits that turn you into someone who’s ready, not lucky.
You don’t need a gym membership. A backpack, your bodyweight, and some simple gear are enough. You’ll progress from city-based training to trail-focused sessions, so the transition feels natural, not brutal.
Essential Gear to Support Your Outdoor and Survival Progress
You can start with almost nothing. But a few smart pieces of gear will massively improve safety and comfort as your training ramps up. Think “low bulk, high utility.”
Consider integrating the following items over the four weeks:
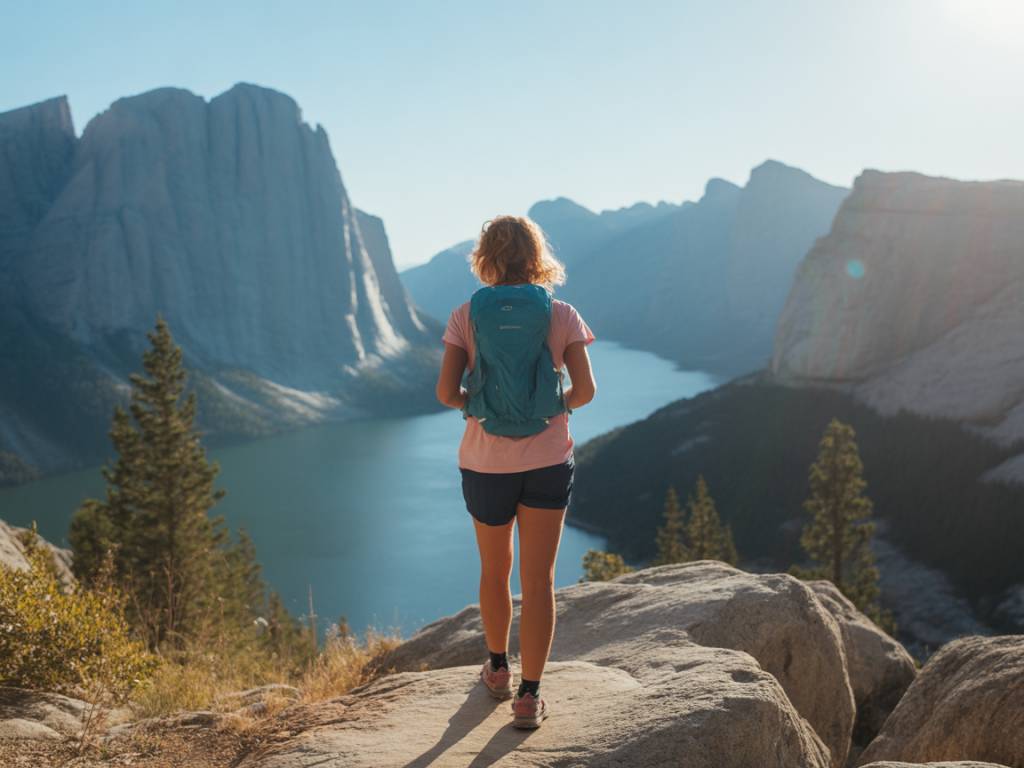
- Backpack (20–30L to start): For loaded walks and to simulate real trail conditions.
- Trail or hiking shoes: Grippy soles, solid support, and comfort over style.
- Water system: A simple 1L–2L bottle or hydration bladder so you always train hydrated.
- Base layer & rain shell: Lightweight, breathable, and packable – your first defense against cold and wet.
- Minimal survival kit: Ferro rod or lighter, small knife or multitool, compact first-aid kit, and headlamp.
- Tracking tool: Watch, smartphone app, or GPS to log distance, elevation, and time.
Buy slowly and deliberately. Test gear during training hikes, not on your first big backcountry adventure.
Week 1: From Sedentary to Moving – Building the Outdoor Foundation
Week 1 is about waking up your body. If you already walk a lot, this will feel easy. If you sit most of the day, it’ll be a reset. The goal is simple: move daily, build basic strength, and introduce minor discomfort.
Objectives for Week 1:
- Walk at least 30 minutes, five days this week.
- Complete two beginner strength sessions.
- Start your “everyday carry” preparedness habit.
Walking & Endurance (City-Friendly):
- 3–5 sessions of 30–45 minutes at a conversational pace.
- Whenever possible, choose routes with stairs, bridges, or mild hills.
- Wear the shoes you plan to hike in so you start breaking them in.
Strength Sessions (2x This Week):
- 10 squats (bodyweight)
- 8 push-ups (elevated on a bench/wall if needed)
- 10 glute bridges
- 20-second plank
Rest 60–90 seconds between rounds. Aim for 3 rounds. Focus on clean form, not speed.
Resilience & Preparedness Habits:
- Carry a small kit daily: water bottle, basic first aid, small snack, and a light source.
- Once this week, finish your shower with 30 seconds of cool water to practice controlled breathing under discomfort.
- Learn the basics of layering: base layer (wicking), midlayer (insulation), shell (protection). This will matter soon.
Week 2: Adding Load, Elevation, and Realistic Outdoor Stress
In Week 2, you’ll shift from just moving to moving with purpose. You’ll start using a backpack, a key step toward trail readiness. The shift is subtle but important: your body learns to carry load without complaining, and your mind gets used to a more “expedition” feel, even in the city.
Objectives for Week 2:
- Walk or hike with a lightly loaded backpack three times this week.
- Complete two slightly harder strength sessions.
- Spend at least one session in a green space or small trail, if available.
Loaded Walks (Urban Rucking):
- Pack 5–7 kg in your backpack (water bottles, books, or sandbags).
- 3 sessions of 40–60 minutes at a brisk but sustainable pace.
- If safe, seek stairs, ramps, and small hills. Elevation is your friend.
Strength Sessions (2x This Week):
- 12 squats (option: hold your backpack to your chest)
- 10 push-ups
- 12 glute bridges
- 20 walking lunges (10 each leg, bodyweight)
- 30-second plank
Aim for 3–4 rounds. Rest as needed, but stay focused. This is your engine building.
Resilience & Survival Mindset:
- During one loaded walk, go out in light rain or cooler weather (with appropriate layers). Learn how your gear behaves.
- Practice navigation awareness: note landmarks, check your direction, and later try to sketch your route from memory.
- Add a small knife or multitool and a fire-starting option (lighter or ferro rod) to your daily carry or training pack, where legal and appropriate.
Week 3: Trail-Focused Training and Real-World Outdoor Readiness
By Week 3, it’s time to leave the flat sidewalks behind as often as you can. Trails, even easy ones, force your body to adapt. Uneven terrain wakes up stabilizing muscles. Small climbs raise your heart rate. The experience feels less like “exercise” and more like “adventure.”
Objectives for Week 3:
- Complete at least one proper trail outing of 2–3 hours.
- Maintain two strength sessions focused on stability and carrying.
- Test a simple “mini day-hike kit” in real conditions.
Trail or Park Hikes:
- 1 session: 2–3 hours of easy to moderate trail, with a 6–8 kg backpack.
- 1–2 additional sessions: 60–90 minutes of urban hills or stairs with the same pack weight.
- Focus on steady pacing, short breaks, and consistent hydration.
Strength Sessions (2x This Week):
- 10–12 squats with backpack
- 8–10 push-ups
- 10 hip hinges (Romanian deadlift style) holding backpack
- 20 walking lunges
- 20–30-second side planks each side
- Farmer carry: hold something heavy in each hand (or your pack in one hand) and walk 30–40 meters
3–4 rounds. Take your time. You’re simulating the demands of steep sections and awkward terrain.
Minimal Day-Hike / Survival Kit Test:
On your longer trail session, carry a scaled-down but useful kit:
- Water (at least 1.5–2L) and salty snacks
- Map or offline navigation app
- Base layer, light midlayer, and a packable rain jacket
- Headlamp or flashlight with spare battery
- Basic first-aid kit: plasters, blister care, pain relief, bandage
- Fire-starting method and small knife or multitool
Your goal isn’t to use this gear. It’s to know how it carries, how quickly you can access it, and what you’re missing.
Week 4: Simulating a Real Hike and Stress-Testing Your Resilience
Week 4 is your field exam. You’ll do a genuine “big day out” within your current limits. Think of it as the dress rehearsal for future overnights, longer treks, or more remote adventures. You’re not chasing speed. You’re proving capability.
Objectives for Week 4:
- Complete one long hike of 4–6 hours with full day-hike gear.
- Perform one maintenance strength session and one movement/recovery session.
- Reflect on your weak points and gear gaps.
The Long Hike (Your Capstone Session):
- Choose an established trail with clear markings and moderate difficulty.
- Pack 6–9 kg, including food, water, layers, and your survival basics.
- Plan for 4–6 hours of total time, including breaks.
- Eat small snacks every 60–90 minutes and sip water regularly.
During this hike, pay attention to your feet, shoulders, and lower back. Hotspots, rubbing, or pain are signals to adjust your pack, footwear, or strength work in the future.
Maintenance Strength (1x This Week):
- 10 squats
- 8 push-ups
- 30-second plank
- 20 walking lunges
2–3 easy rounds, just enough to remind your body of the patterns.
Movement & Recovery Session (1x This Week):
- 20–30 minutes of light walking or cycling.
- 5–10 minutes of stretching focused on calves, hamstrings, hip flexors, and upper back.
- Optional: a short session of breathwork – slow nasal breathing, in and out, to calm the system.
Resilience Debrief:
- After your long hike, write down what went well and what felt hard.
- Note any gear failures, missing items, or discomforts that surprised you.
- Ask yourself: if I had to stay out one unplanned night, how ready would I really be?
From Fitness to Real-World Outdoor Resilience
By the end of these four weeks, you should feel a clear shift. Stairs are easier. Your backpack no longer feels like a burden. A few hours on the trail seems manageable, maybe even enjoyable. Most importantly, you’ve begun to think like someone who takes responsibility for their safety and comfort outdoors.
There’s plenty of room to go further. You can:
- Increase pack weight and trail difficulty.
- Learn advanced navigation with map and compass.
- Take a wilderness first-aid or survival basics course.
- Start experimenting with overnight trips and minimalist camping setups.
The biggest shift, though, is mental. When you walk through your city with a loaded backpack, water, a light, and basic tools, you feel different. When you look at a hillside trail, you no longer see an obstacle; you see an invitation. That’s what being outdoor-ready and resilient is really about – knowing that wherever you step, from city streets to wild trails, you’re not helpless. You’re prepared.