Building an ultralight kit does not have to mean spending a small fortune. That is the myth that keeps many hikers from getting started. In reality, a smart, budget-friendly setup can make weekend trail adventures lighter, more enjoyable, and far less punishing on your body. You do not need the most expensive carbon-fiber pole, the most elite down quilt, or a pack that costs as much as a full wilderness course. You need a system that works.
For short trips, the goal is simple. Carry less. Move better. Stay comfortable enough to enjoy the trail. If you approach the process with discipline, you can assemble a lightweight kit that performs well without draining your wallet. The key is to spend where weight savings matter most, and save money everywhere else.
Why a Budget-Friendly Ultralight Kit Makes Sense for Weekend Trail Adventures
Weekend trips are the perfect place to test ultralight principles. You are usually out for one or two nights, which means you can reduce food volume, limit fuel needs, and simplify your clothing system. You also have less room for error. That makes efficiency more important than ever.
A budget-friendly approach keeps the barrier to entry low. It lets you experiment before committing to expensive upgrades. It also helps you learn what actually matters to you on trail. Some hikers need more insulation. Others want a larger sleeping pad. Some can hike with a tiny pack; others need better load transfer. A cheap first system gives you real-world feedback without buyer’s remorse.
The ultralight philosophy is not about suffering. It is about reducing unnecessary weight so your energy goes toward walking, camp setup, and recovery. On a weekend trail adventure, that can mean more miles covered, less fatigue, and a more relaxed experience overall.
Start With a Base Weight Goal for a Budget Ultralight Setup
Before shopping, define a target. For weekend trips, many hikers aim for a base weight under 20 pounds, while more committed ultralight hikers may target under 10 pounds. If you are building on a budget, a realistic first milestone is often somewhere in the middle. That is still a huge improvement over a heavy traditional kit.
Base weight means everything in your pack except consumables like food, water, and fuel. It includes your pack, shelter, sleep system, clothing, stove, and essential tools. This number matters because it reveals where your big opportunities are. A 6-pound backpacking tent, for example, is an obvious place to look for savings. So is a heavy sleeping bag or a massive pack.
Track your current gear first. Then make a list of the heaviest items. Those are your priority targets.
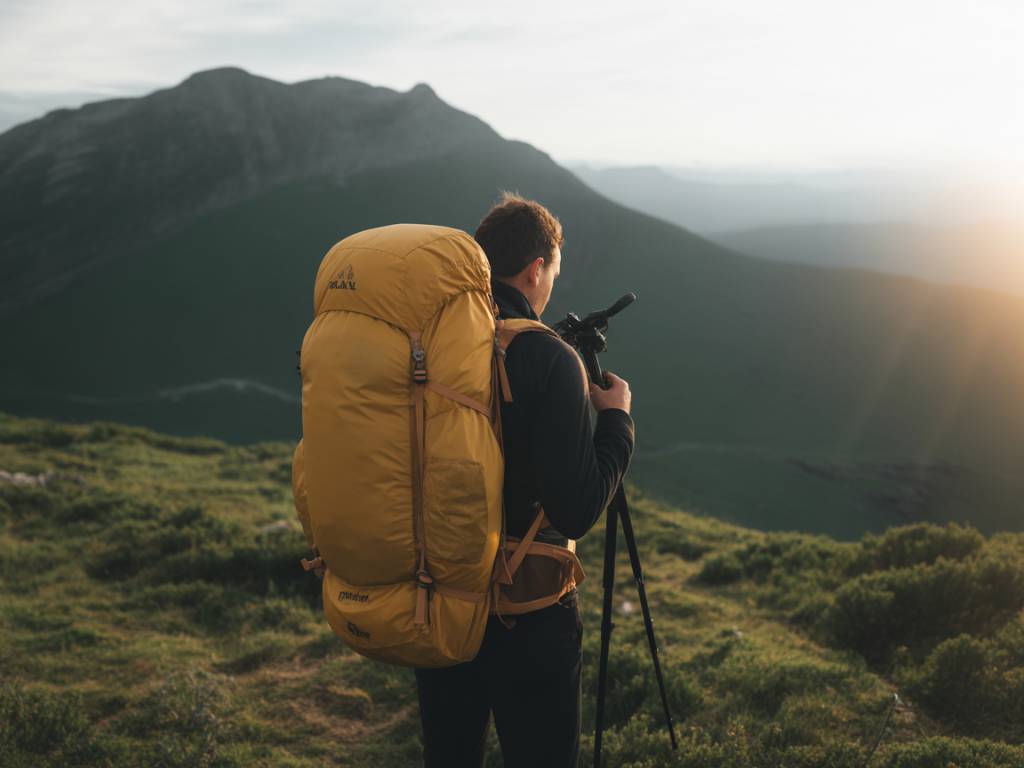
Choose a Lightweight Backpack Without Overspending
The pack should support your load comfortably, but it does not need to be expensive. For weekend adventures, many hikers can use a frameless or lightly framed pack if their gear is compact and the base weight is low. That said, beginners often do better with a simple framed pack because it carries weight more comfortably.
Look for features that match your needs, not marketing hype. A durable fabric, reasonable capacity, and a good fit matter more than exotic materials. Many affordable packs on the market weigh far less than old-school backpacking models and cost significantly less than premium ultralight brands.
- Choose a pack around 30 to 45 liters for most weekend trips.
- Prioritize fit over minimal weight if you are carrying a modest load.
- Look for used or previous-generation models to save money.
- Skip oversized packs that encourage overpacking.
If your load is still heavy, do not force a frameless pack. A lighter pack is only useful when your gear supports it.
Build a Simple Shelter System That Saves Weight and Money
Shelter is one of the best places to save ounces, but it is also where people often overspend. You do not need a premium ultralight tent to go light. There are plenty of budget-friendly options that work beautifully for weekend trail use.
A single-wall trekking pole tent can be a strong value if you already hike with poles. A tarp is even cheaper and lighter, though it requires more skill and a willingness to adapt to weather. For many hikers, a budget bivy paired with a tarp can be an effective low-cost shelter system. It is simple. It is compact. It works.
When shopping, think about the conditions you actually face. Mild forest trails in fair weather do not demand the same shelter as exposed mountain routes with heavy rain and wind. Avoid paying for unnecessary storm protection if your typical weekends are relatively stable and predictable.
- Trekking pole tents often offer the best balance of weight and convenience.
- Tarp setups can be very affordable, especially for experienced hikers.
- Used shelters can deliver major savings if the fabric and seams are in good condition.
- Practice setup at home before trusting any shelter in the field.
Sleep Light With a Budget Sleeping Pad and Quilt Strategy
Your sleep system affects comfort, recovery, and morale. It also accounts for a significant portion of pack weight. A budget-minded ultralight kit should focus on warmth-to-weight efficiency, not just the cheapest possible sleeping bag.
Quilts are often lighter and less bulky than traditional sleeping bags, and they can be a smart buy if you understand your temperature needs. However, many beginners can save money by using a quality synthetic sleeping bag on sale or by buying used. Synthetic insulation is usually heavier than down, but it handles moisture better and costs less.
Sleeping pads are another important decision. A lightweight inflatable pad offers comfort and packs small, while a closed-cell foam pad is cheaper, more durable, and nearly indestructible. For budget ultralight hiking, a foam pad can be an excellent starting point. It is simple. It weighs little. It will not puncture in the middle of the night.
- Use a foam pad if you want durability and low cost.
- Choose an inflatable pad if comfort is a priority and the budget allows.
- Match insulation to the lowest temperature you realistically expect.
- Consider a quilt only if you are comfortable managing drafts.
Keep Cooking Gear Minimal and Affordable
Cooking systems can become unnecessarily complicated. For a weekend hike, you often need very little. A small canister stove, a lightweight pot, and a simple spoon may be enough. That setup is efficient, fast, and easy to clean up after a long day on the trail.
If your trips are short, you can also simplify even further. Many hikers rely on no-cook meals for two-night outings. That eliminates the stove, fuel, and lighter entirely. It also reduces cleanup and pack volume. The tradeoff is comfort, especially in cold weather.
When a stove is worthwhile, choose one that is known for reliability rather than chasing tiny weight savings. A cheap but dependable stove often beats a fragile premium option. Pair it with a pot that matches your meal style, and avoid carrying unnecessary extras.
- Use one pot instead of a full mess kit.
- Choose dehydrated meals or simple boil-and-eat foods.
- Bring only the fuel you need for the weekend.
- Skip bulky utensils and duplicate containers.
Use Clothing as Part of the Ultralight System
Clothing is one of the easiest areas to overpack. Many hikers bring far more than they need, especially on a short trip. The goal is to carry versatile layers that can be mixed and matched as conditions change.
Start with what you wear while hiking: a moisture-wicking shirt, shorts or pants, and supportive footwear. Add one insulating layer, one weather shell if needed, and a sleep layer that stays dry. That is often enough for a weekend trail adventure. Everything else should earn its place.
Budget-friendly clothing choices can still perform well. You do not need top-tier branding to get a functional fleece, rain jacket, or synthetic puffy. Look for sales, outlet models, and items from reputable mid-range outdoor brands. Pay attention to fit, breathability, and drying time.
Buy Used, Repurpose, and Upgrade Slowly
One of the smartest ways to build a budget ultralight kit is to avoid buying everything new. The secondhand market is full of gear that still has years of life left. Used sleeping bags, packs, tents, and trekking poles often offer the best value per ounce saved.
Repurposing also helps. A lightweight kitchen bag can become a ditty bag. A simple stuff sack can organize layers. A foam pad can double as a camp seat. Small tweaks like these reduce clutter and keep your kit functional without adding cost.
Upgrade gradually. That approach protects your budget and helps you make informed decisions. If you replace the heaviest item first, you often see the biggest payoff. Then move to the next weak point.
- Shop used gear marketplaces and local outdoor swaps.
- Replace only the items that offer major weight savings.
- Avoid impulse purchases based on internet hype.
- Test every upgrade on a short trip before committing further.
Pack a Smart Weekend Trail Essentials List
An ultralight kit still needs the essentials. The trick is to keep them focused. Bring safety items, navigation tools, and a compact first aid kit, but trim redundancy wherever possible. A weekend trip does not require a disaster-proof mobile command center.
Your essentials should reflect your environment. In some areas, navigation is straightforward and water is abundant. In others, a filter and map skills are non-negotiable. Build around the trail, the forecast, and your own experience level.
- Navigation: map, compass, and phone with offline maps.
- Water treatment: filter, tablets, or another reliable method.
- First aid: small kit tailored to blisters, cuts, and minor pain.
- Emergency items: headlamp, whistle, fire starter, and insulation.
- Repair: tape, a small knife or multitool, and a few cordage pieces.
Do not confuse minimalism with carelessness. A light kit should still support self-reliance.
Test, Refine, and Trim the Weight Again
The first version of your budget ultralight kit will not be perfect. That is normal. The trail will tell you what works and what does not. Maybe your pack needs better hip support. Maybe your pad is too thin. Maybe your shelter is fine, but your cook kit is more than you need.
After each trip, review your setup honestly. What did you not use? What was annoying? What made the experience better than expected? These questions matter more than brand names or online trends. Every unnecessary ounce removed makes the next trip smoother.
The best budget ultralight kit is not the one with the fanciest parts. It is the one you can afford, carry comfortably, and trust when the weather changes. Build it carefully. Refine it often. Then get back on the trail with a pack that feels lighter and a mindset that feels freer.